|
On November 11, 2020, while my colleagues were all enjoying a Wednesday off for Veteran's Day, I was signing online early in the morning to begin a very long day of arranging OBS window captures and recording theater. This post is about that process and the reasons for the decisions I made as an educator. I hope that you can find something useful here to take, and leave what does not apply to you. Adapt this to your own situation. This is by no means a template, nor did I do everything perfectly. My situation
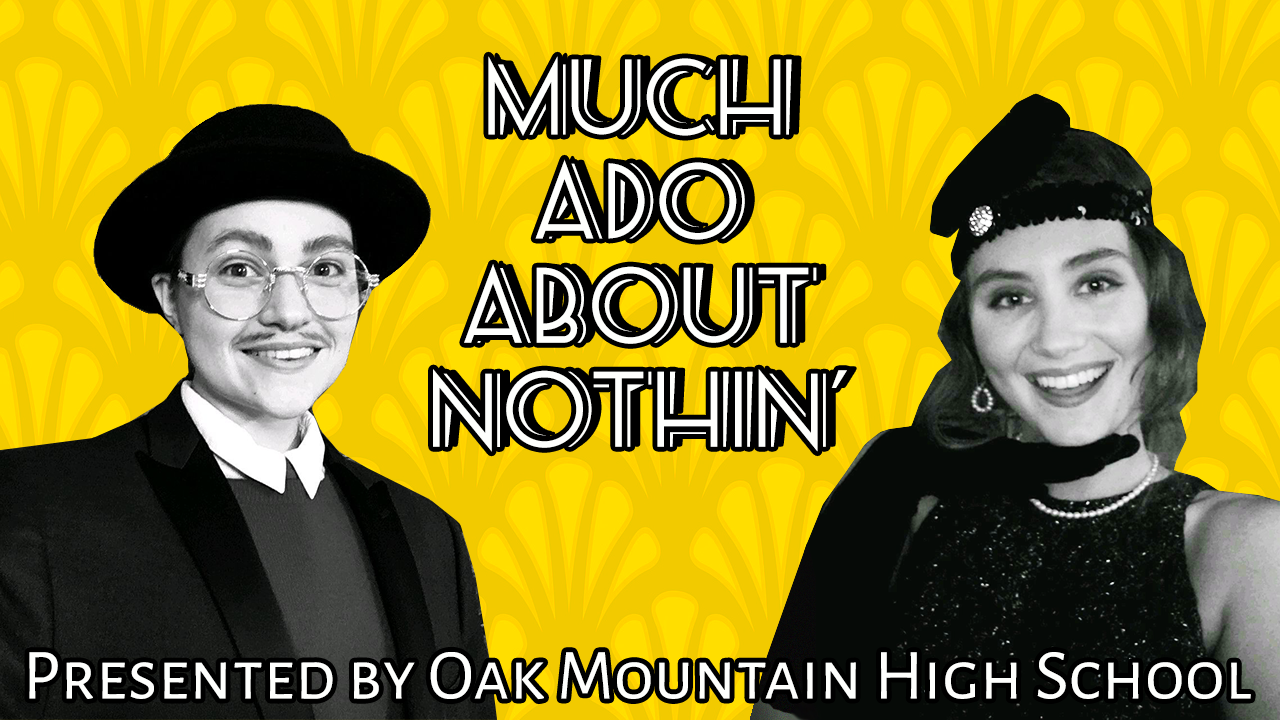
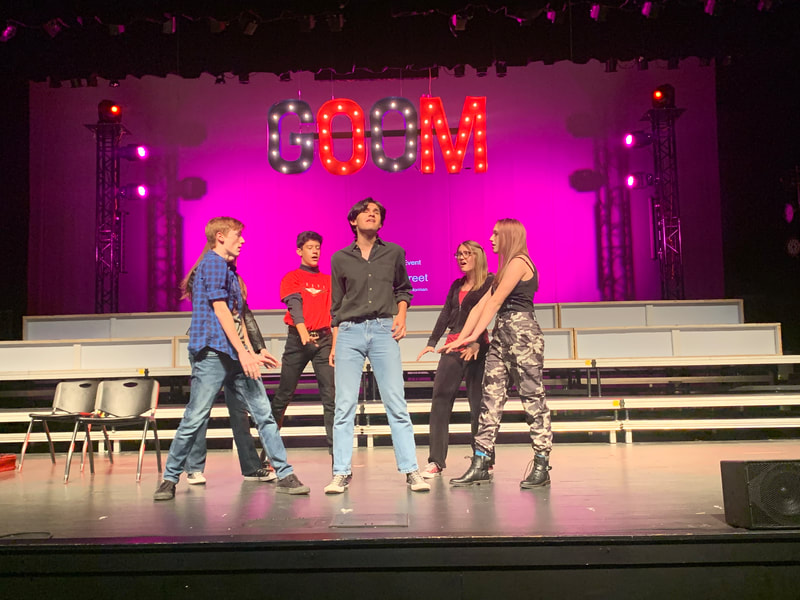
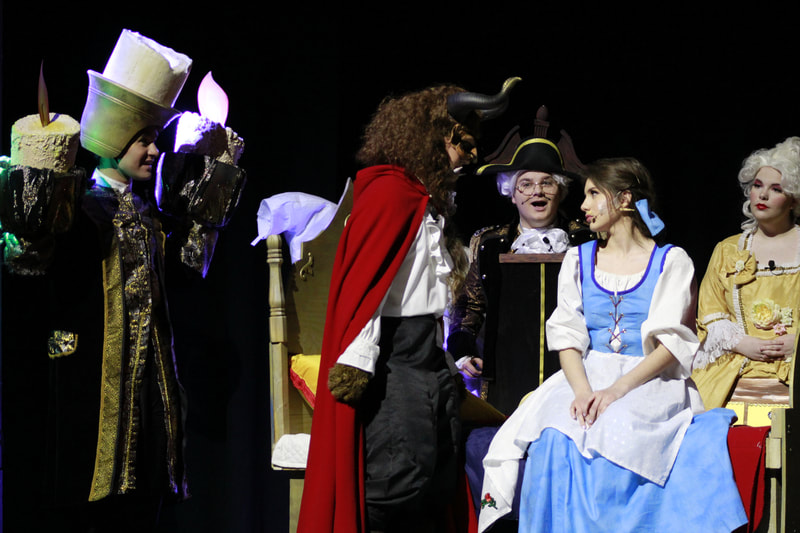
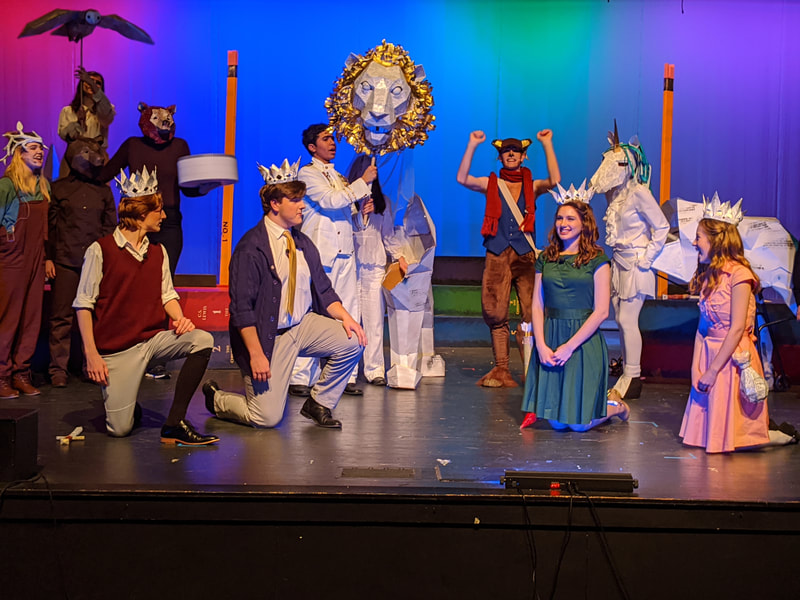
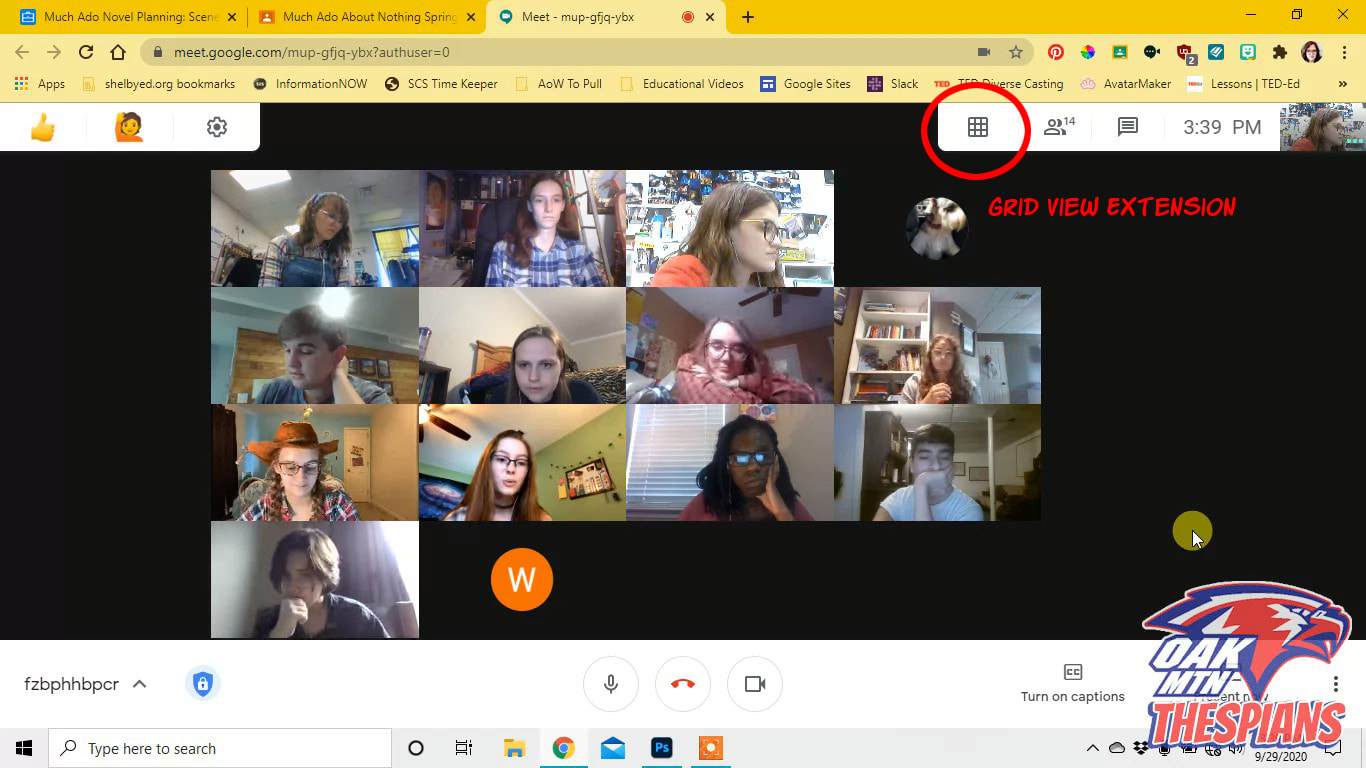
In February, 2020, our plan for the fall was to do a devised physical theatre piece for competition while we rehearsed our musical. Our most likely choice would have been Into the Woods. Our musical would have launched in January, and our spring play would have been a roaring 20s adaptation of Much Ado About Nothing on stage with a live jazz ensemble playing background music. In the spring we were not permitted to video chat with our clubs or classes on any platform. In August, this changed to allow us to only video chat via Google Meet on our school Google Account. This meant Zoom (virtual backgrounds, breakout rooms, etc) were a no-go. CAPTION: Left: Our production of 21 Chump Street in fall 2019. We took Best in Show at our state competition and were looking forward to defending our title. (Photo by Abby Nicholson) Center: Our January 2020 production of Beauty and the Beast. Following that show I got a mysterious flu that tested negative for Flu and is the sickest I've been since I had Mono in 4th grade. Hmmm. (Photo by Lee Tran) Right: Our canceled production of The Lion, The Witch, and the Wardrobe from our Wednesday night dress rehearsal (one day before a positive case in Alabama.) The reason we were broke this fall. (Photo by me.) How did we begin?In August we had a virtual officers meeting of our Thespian Troupe to discuss plans and decided that contact work for a physical theater piece was out of the question. Instead the students asked if we could do a small virtual play for competition and if I could write something (as I have written a one-act before that they read and enjoyed) based on the lockdown text chats our club had in the spring. I had agreed with our Choir and Band director to kick the question of the musical down the road to second semester, and not wanting to lose a chance to do Much Ado About Nothin', we decided to move it to fall. Right after that meeting we learned we would be leaving A/B schedule for face to face five days a week (though two students in our production were fully virtual). With the increased number of quarantines that caused, I decided the production could not be filmed on stage and would need to be fully virtual. Certain students disagreed with this decision, but ultimately that decision turned out to be crucial because our Claudio got quarantined on the day before filming. We held auditions on Flipgrid with students choosing monologues, and after a few meetings with our script adaptation group (the kids put it in modern text and added 1920s slang and references) we chose a cast. Our small, 15-minute competition show, Waiting For Monroe became an excellent test-run for the bigger show. The Trouble With CastingAt first, barely anybody auditioned. I had an emergency meeting with my officers a few days before auditions closed. They talked to their friends who had been planning to audition and found out the truth. The kids were reticent to be in a virtual show that their peers could watch, mock, and meme. I couldn't exactly blame them. Kids are often cruel. An emergency decision was made to make the production a "Speakeasy" show (it fit our theme anyway!) where the link would not be publicly posted and instead students in the cast would share the link with friends and family and send them a password too. We made the show available for a limited time over Thanksgiving break, too. I am taking orders for a DVD now. We did not get most of those kids who we thought would sign up to audition for a number of reasons-- mental health, disappointment in the virtual nature of the show, and being overwhelmed with Edgenuity work among them. Instead we decided to cast girls in drag for most of the leading men. Our adaptation had already changed Leonato, Antonio, and Don John to women. We cast girls as Benedick and Claudio, and they were fantastic! We also did a lot of double casting (Ursula/Verges, Dogberry/Margaret) and cut a chunk of a scene so we could double cast Antonio/a with the Sexton (The Capo in our version). Google MeetOne thing we learned quickly from Waiting For Monroe (the short play) was that the variable frame rate recording of OBS was going to be a problem with the heavy CPU demands of Google Chrome. If you hit Ctrl+Alt+Del right now and look at Task Manager, you will see Chrome (granted you aren't reading this on Safari or something) using ten or more processes. These are tabs and plugins, and my county has a lot of Google Chrome Extensions running that I don't need, want, or care for. But I can't take them off. It is essential if you are in a Google Schools system that you log out of your browser and turn off sync. Do this by clicking your profile image in the top right corner and using the menu there. Then go turn off ALL plugins you do not need. Later when you decide to log back into your browser, these plugins will be waiting for you on Sync (you will get them back) but I turned off EVERYTHING (including the ones I use) except the one I needed for this show. We learned this when we did Waiting For Monroe. There are bits of that show where the CPU strain SPIKES from Google and it causes skips in our recording. I'm glad we learned this early on a small show that was set online where it wasn't that disruptive. It would have been very frustrating to discover on the much longer show. After you turn off Sync and get rid of every extension, install Google Meet Grid View (Fix) for your show. This plugin adds a little waffle icon to the top corner menu on Meet that will let you enter a screen capture mode. This mode removes student names (yay!) and locks them into 16:9 aspect ratio in a grid. If someone leaves the chat (on purpose or by accident) it will save their spot. The grid will not rearrange. They can re-enter without moving. This is absolutely essential to run a show in Window Capture on OBS. Throughout my long day of filming, I toggled this on and off between scenes to allow the grid to rearrange for which actors were present. Eg. If I had just filmed a Ben/Bea scene, I would turn it off while more actors were entering the chat for the next scene, and then when everyone was present turn it back on to lock their windows. CAPTION: A screengrab from an early read-through of Act 3. Students are locked into a grid. If someone entered, they would join the fourth row, two from the right. If someone exited, they would leave their space open and enter back into it. The only way this grid changes with it turned on is if three students entered and a new row had to be created to accomodate them all. NOTE: The more windows on screen, the lower the quality will be for a window capture. I kept the Meet Window in my biggest computer monitor to mitigate shrinking of window quality, but with everyone on variable internet quality and with differing web cam access, resolution was never going to be good. We didn't have access to virtual backgrounds, so I sent home a 4'x4' roll of photo backdrop paper (brick) with each child. Their costumes were a mix of their own purchases and recycled pieces from our attic. The only thing the drama club bought was that paper. Students were responsible for their own lighting, mics, and cameras, but we spent a lot of time in rehearsal discussing how to get better lighting, framing, etc. Open Broadcasting SystemWe did our recording and arranging of windows in OBS. OBS is free and open source, but as such it can be glitchy. If it is doing something odd, the best bet is to close and reopen it. It doesn't have an undo command and window captures will not be saved if you close the window. Because of this, we decided to film live-to-tape scene by scene. You see, we had some scenes with two layouts and some scenes with over a dozen. We had to crop and arrange every window before filming (cannot save layouts and crops from rehearsal!) and while I got faster at is as we went along, it would not have been feasible to lay out the whole show this way and do it in one take. It definitely would have been a disaster to do it LIVE. OBS has a window capture mode that allows you to capture what is happening live in any tab or window. For each child I had an instance of Window Capture with their name as its title. Each "scene" in OBS was numbered by act, scene, and number (usually individual French scenes but sometimes just moving our "screen blocking." Within the Act/Scene I copied and pasted their window capture to each numbered scene they were in and used the Alt+Mouse to crop the windows to fit in the boxes I had put in. All students in a scene stayed in the chat (muted!) throughout the scene. Their entrances and exits were managed with OBS scene changes. They practiced stepping into frame as we rehearsed "blocking." A video layout for each screen looked like this (ordered slices with first at the top and last at the bottom!)
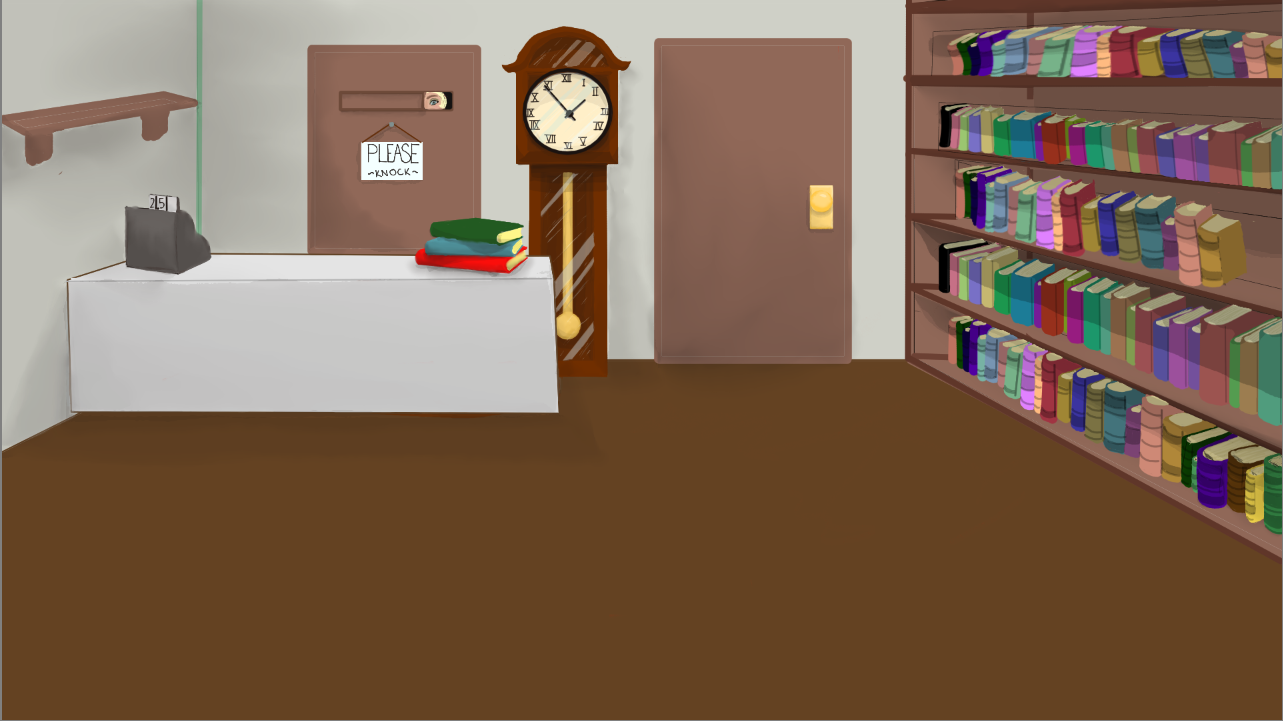
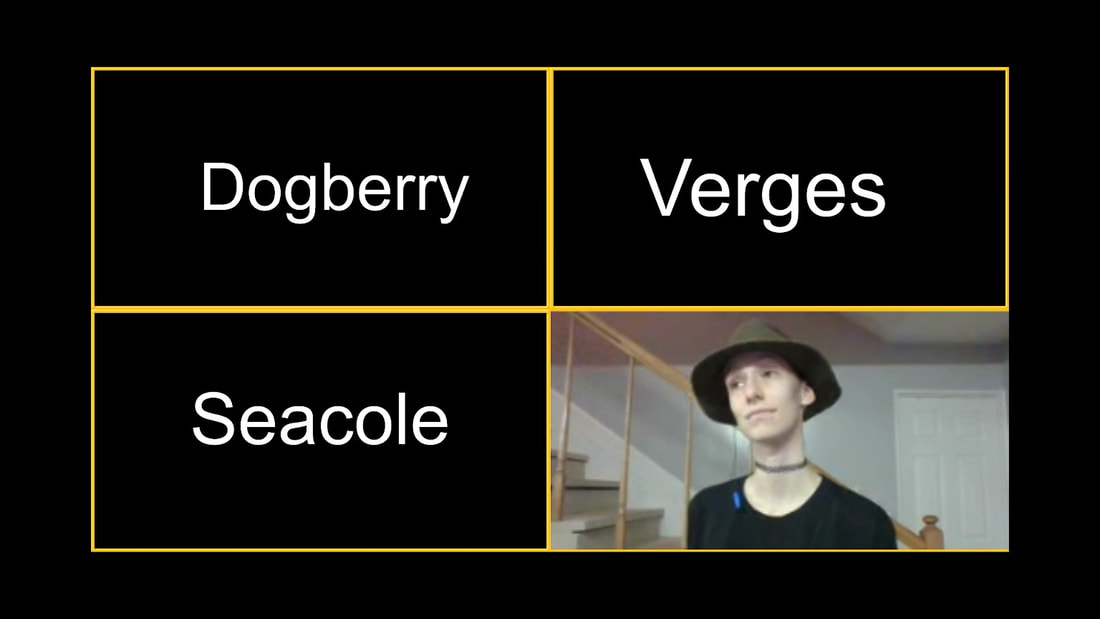
CAPTION: A scene illustration by students Naomi Chaves and Emily Jensen. These illustrations preceded every scene and then stayed in the background throughout the scene as windows entered and exited. In the first scene shot we included a title. This book shop is the front for the Speakeasy, "Messina" in our adaptation. When using OBS it's essential to make sure you have the audio sources properly captured because the sources I listed above were ONLY for video and those windows would come in muted on their own. CAPTION: The grid with character names. This grid in this moment has one window capture, "Veronica" cropped to show a single performer. After this, I imported three more window captures and covered up the names. For final recording there was a background and the gold grid box was turned invisible. Our scene "Blocking" was worked out in rehearsals with the following rules:
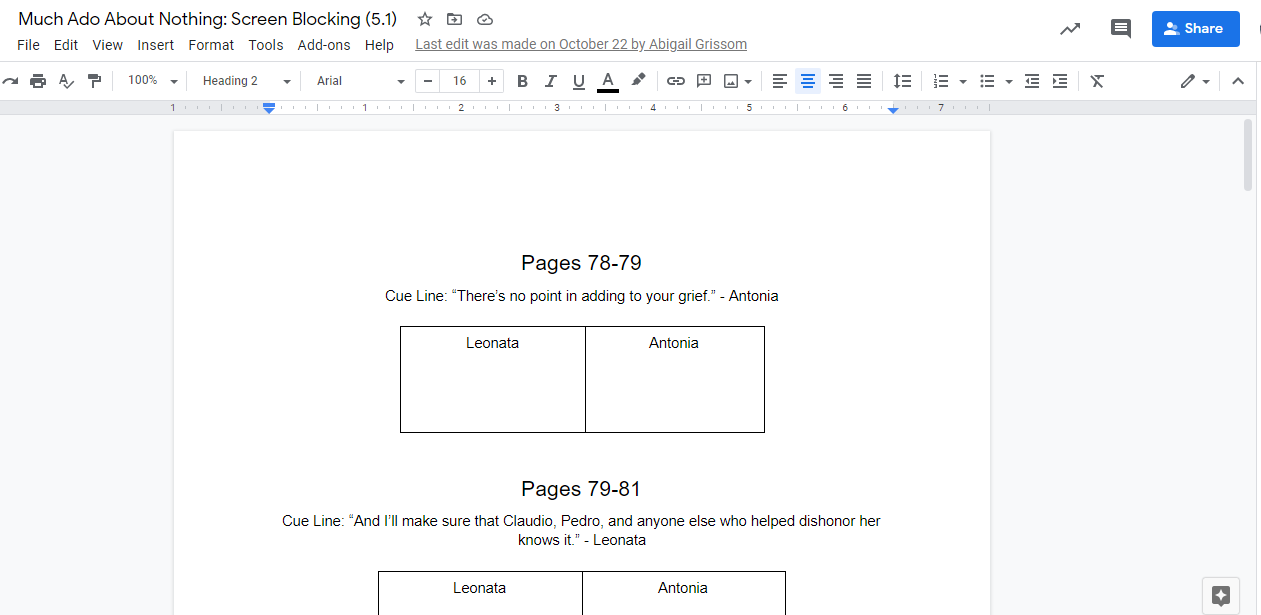
CAPTION: A document my stage manager made and posted every night on Classroom after blocking rehearsals. I set scene transitions for each change (mostly move transitions so the windows slid around on the screen but certain fades and cuts) and drilled the scene changes a lot during tech. For asides we duplicated a capture window and filtered that copied capture on top to black and white so the speaking character was the only person in color. It was a headache and a big drain on my executive functioning to manage all those cues all day long with few breaks. If I had to go back, I might do fewer layouts within certain scenes to save myself headache. Show Cue SystemsIn addition to recording on OBS and running all the scene changes on that software, I had a second monitor set up so I could run sound. Because sound is not perfectly synced over video chat (there is ALWAYS latency which is why you can't sing along live to someone on Zoom, Meet, or any chat platform) I ran the cues so that the audience would hear what I heard for timing. I ran the cues off of Show Cue Systems and had my script marked with pink highlighted scene cues and yellow highlighted sound cues to help me juggle these two jobs. We had a few background noises (footsteps, glasses clinking, etc) and some music cues. This did take CPU resources away from OBS, but I have 32G of RAM and honestly it wasn't as demanding as the superfluous Google Extensions from county, so it worked out okay. I still recommend doing this on a desktop with more RAM. Note that OBS can manage certain sound cues (in Waiting For Monroe we had a sign on and off noise that OBS played automatically during scene changes. Every time a character signed on, I shifted scenes and a chirp automatically played once) but they must accompany scene changes and will be disrupted by further scene changes (ie. you cannot have a music cue running on OBS that you change scenes during, at least not to my knowledge). I made sure OBS had an audio capture source of my desktop and students were forbidden from typing in the Meet Chat during recording so the notification sound would not end up in our recording. Back to Meet...Our recording process involved kids signing on only when they got the All Clear at the scheduled time on our GroupMe chat. We usually scheduled more time than we needed but twice we ran over due to technical issues and so we didn't have to worry about a join request popping up in our recording. When we recorded, I set my camera on Meet to OBS. In order to cast your OBS screen as a camera, you used to need a plugin called OBS Virtual Cam. Now OBS has the feature inherently (that changed during our rehearsal process). If you turn on Virtual Cam, your OBS window will become a source and you can set that as your camera. Instead of seeing you on your Webcam, your students will see the screen that is being recorded. I had them pin my window always so they could monitor their eyelines and see when entrances and exist occurred. The other thing I had to do was switch my audio source to my PC sound. This allowed them to hear music and SFX cues from my desktop but NOT my microphone. I did a lot of switching audio source back and forth all day. Be careful not to hover your mouse over any windows during recording or you will capture a dimmed window with mute and boot icons. CAPTION: Our "test run" of Waiting For Monroe. Several children in this play had never been in any theater production before, so it was a fun way to bring in new members and try out our tech before the bigger show. Note this is a fictional video chat platform and that the background, mute icons, character names, etc are all graphic layers in OBS. Editing it TogetherI dropped the clips into a video editing program and threw stinger transitions over the changes. I added our introduction, intermission, and thank you video, and that was it. Every scene was a recorded as a single take with no cuts in the middle. Only once or twice with extreme tech stuff did we start over (because doing several runs of each scene would have made the day go much longer!) I recorded from 9am until 5:30p with an hour lunch break and a few five-minute breaks throughout the day. It was a lot. I couldn't have done it with kids at home, and my husband left for the day to hang out with his sister so he wouldn't use our internet for streaming or gaming. He works from home (a permanent change due to COVID), so doing it on a Holiday was essential as he works at a bank and didn't need to be online. Occasionally the dog would bark, which was fine when my mic wasn't on. There is a dog bark in our final production from a kid's house, but the scene was outside in an alley so we decided to go with it. If we were fully virtual I may have recorded over several days or recorded in the evenings over the course of tech week. I had a few issues with Adobe Premiere Rush rendering titles with OBS footage. If you experience issues with the clips you record out of OBS, run them through a program to make the frame rate consistent (you may see as you record that the FPS on the bottom left corner drops below 30 FPS from time-to-time. This is a feature of OBS that allows your computer to not freeze if you are recording a game and a webcam and suddenly the game takes up more CPU. It'll just make your footage choppy instead of crashing!) Adobe video products are some of the industry standard, and even they are not fans of variable framerate footage. Our final show was uploaded to YouTube. We made the link unlisted and embedded the play on a Weebly password-protected page (I paid for the month subscription out of pocket because getting the PO to cover it would have been a headache I didn't need on top of everything else) and sent out the link and password to families and friends. We made it available for free but put a link all over the site and in our Instagram bio asking for donations. I was ambitious and decided to caption it all on YouTube. All two hours of it. My student director, Emily, who takes ASL got service hours to help me do a little of it, but I did most of it myself before Thanksgiving while students worked on research projects. I hate YouTube's caption system and spent about eight hours of my life captioning it, but the entire two-hour play was accessible to the hearing impaired! My SaviorMy saving grace in all of this was my assistant director (student!) who was able to watch and direct when I was busy tied up in tech. If you have a super tech savvy student who can learn OBS and run all of the sound and window capture for you, you may consider passing off tech to a kid. I didn't have a kid who could learn this stuff in the short time we had to get it done, so I did it. Therefore my AD, Emily, was my hero this fall. Get yourself a well-trained senior and let them try their hand at directing if you're going to do this. It was a great learning experience for her, too! CAPTION: Here is the wedding scene in full as recorded straight from OBS before cropping. You can see where we restarted because I screwed up the audio input and see the tail of the clip too. This scene was trimmed and put into the timeline for the final video. You can see how gazes changed depending on layout and how music and SFX were incorporated. Any Questions? This was a steep learning curve for me and I KNOW I have left out useful tips and answers to issues. Please leave questions and I'll try to update this post occasionally with FAQ. Thanks!
0 Comments
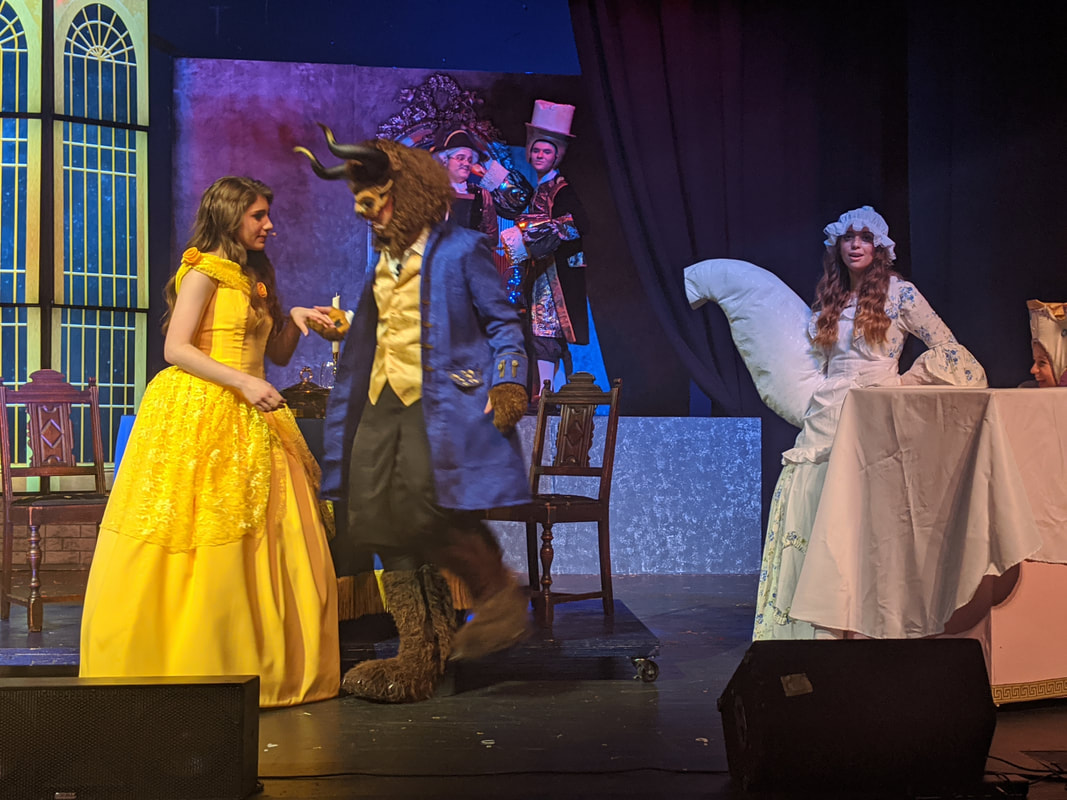
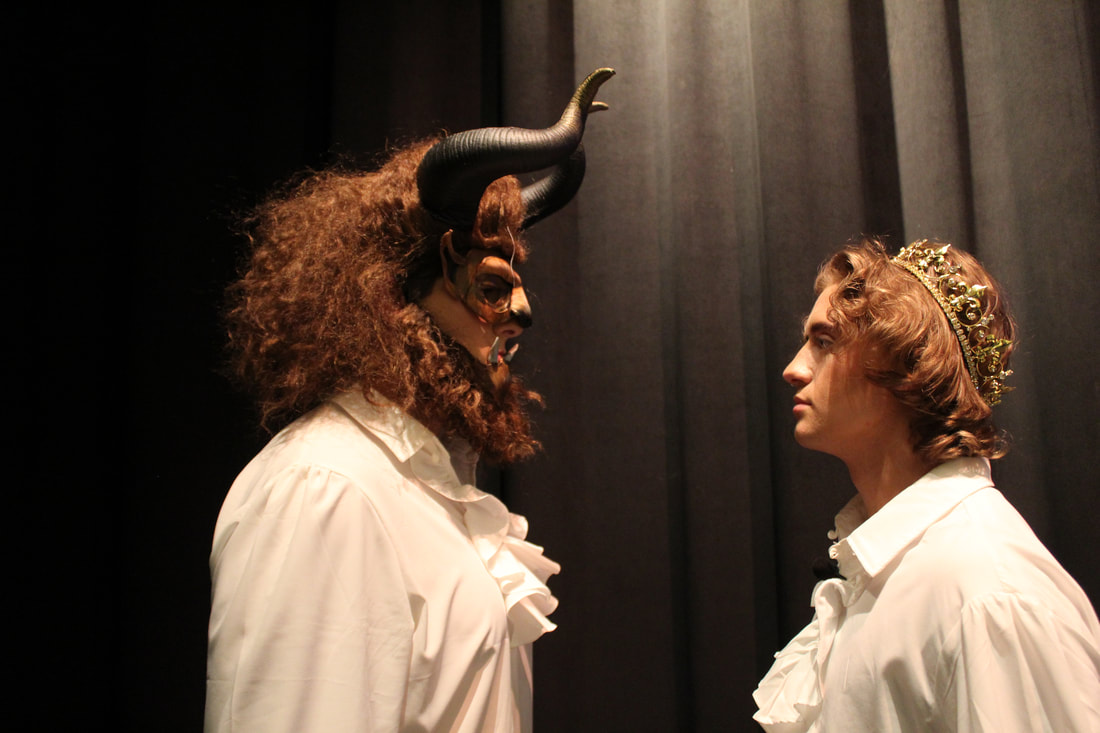
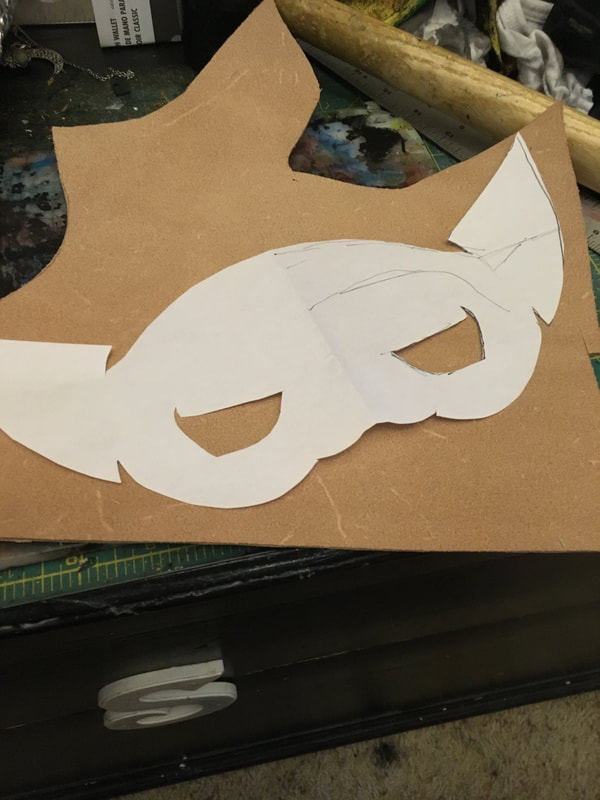
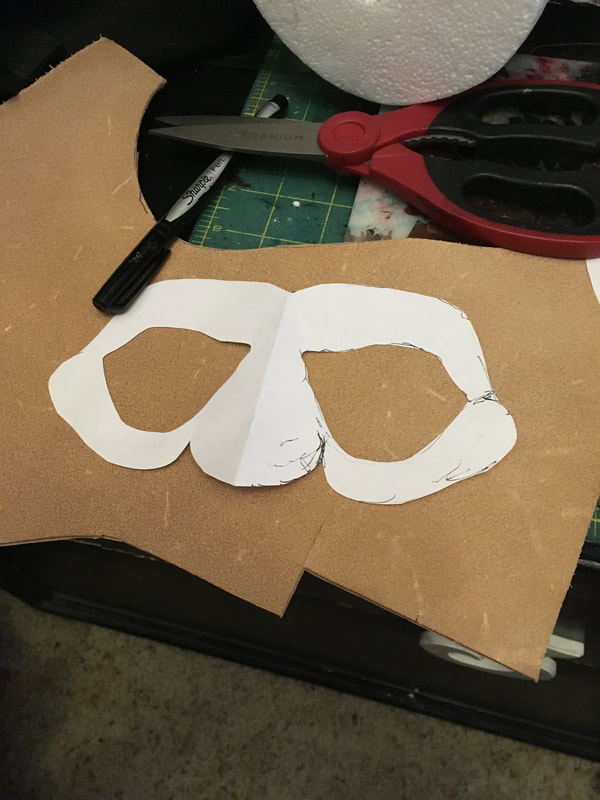
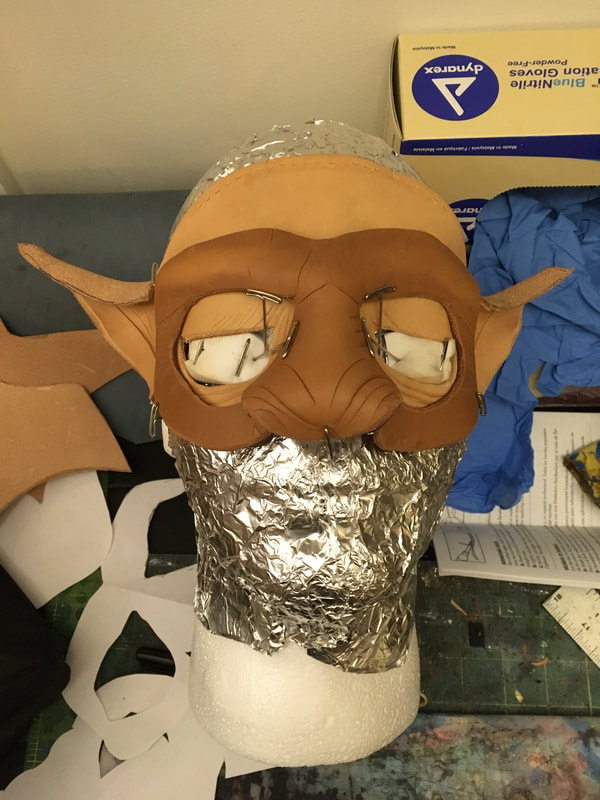
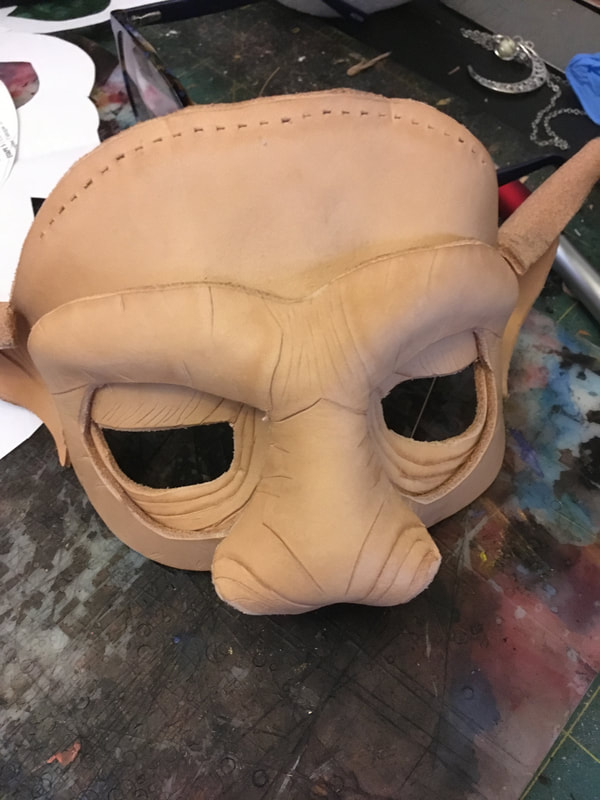
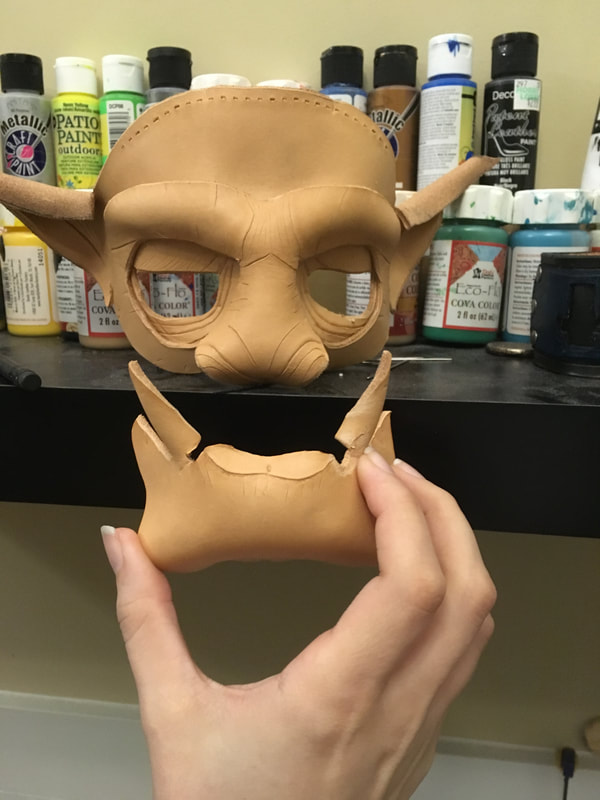
On January 12, 2020, we closed our school production of Beauty and the Beast. It was a chaotic weekend because of weather cancellations and postponements and overall we lost a show from our run, but it was still a HUGE success. Since posting images of our production, I've received a lot of questions about our Beast costume, so I'm going to do my best to share process photos here as well as links to the materials we used. His blue coat was a "Victorian" (Amazon keywords for historical clothing are NOT accurate) cosplay coat with the trim painted gold. We bought it on Amazon and removed and repainted buttons too. (Link.) The coat was paired with a gold vest for the "Beauty and the Beast" iconic number. His base costume always included a poet shirt, even as the prince. Search terms "Pirate" and "Gothic" will help you track down similar items. (Link.) We also put him in black knicker pants and sewed padding into the thighs in front to achieve something like a reverse leg wolf effect. For gloves he wore fingerless paw gloves (Link). All of the fur in his costume was painted to match the color of the wig. The feet were created by a student who used fur, batting, muslin, hot glue, and some sewing to make a wolf paw look. We started with a Demonia platform boot because the boy playing Beast was as tall as Belle, and we added lifts inside to boost him nearly six inches. The boots were covered in fur and the heel exposed to create a walking on toes look like a dog. Padding was added to the back to bring out the calf and with the thigh padding, exaggerate the illusion of a reverse dog leg. My student, Emily, made little stuffed balls of fabric to attach to the boots and covered them in fur. These were the individual toes. We also glued claw claws into the front for toenails. She left the zipper accessible, which was much easier on side-zip boots. The boots we made for our understudy, who was also the body double for the prologue, were back zip and that made the padding part MUCH trickier. The MaskThe mask was my own project after our previous musical wrapped, and it made the transformation very easy. I constructed a leather mask in two layers. Below are images of the templates I created. The base layer was wet-formed on a mannequin and once it was dry, the next layer was formed on top of it to add depth. The pieces were then glued and painted before stitch holes were punched and they were stitched into a wig (Link.) The last step was to add a pair of horns (Link), which we'd used in a past show so the horns were already tipped with bronze paint to add depth.
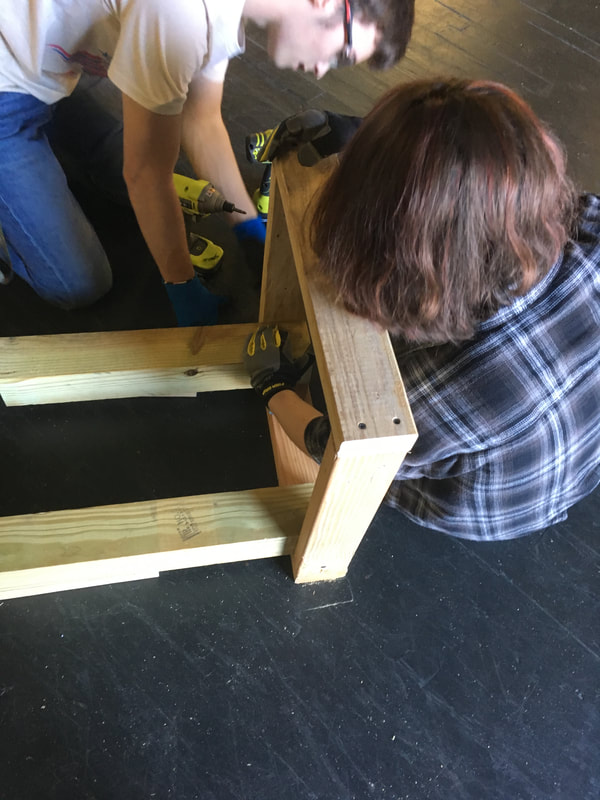
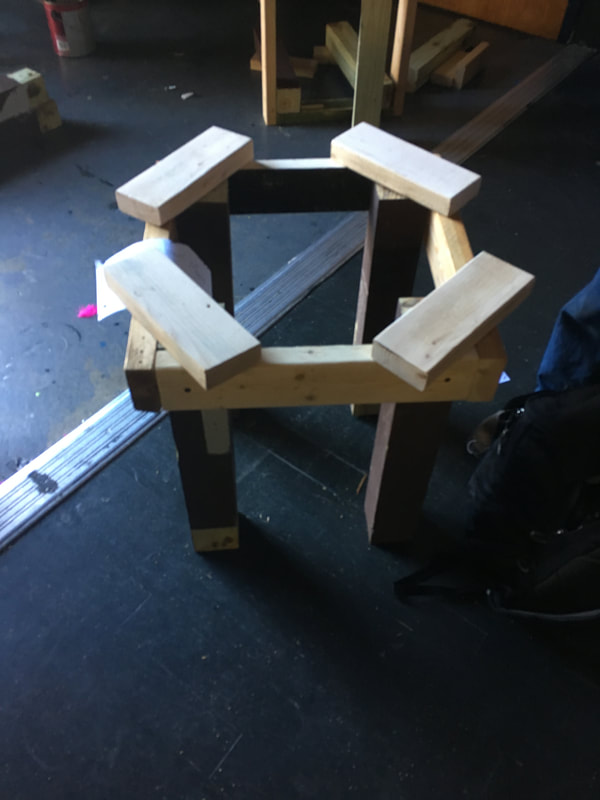
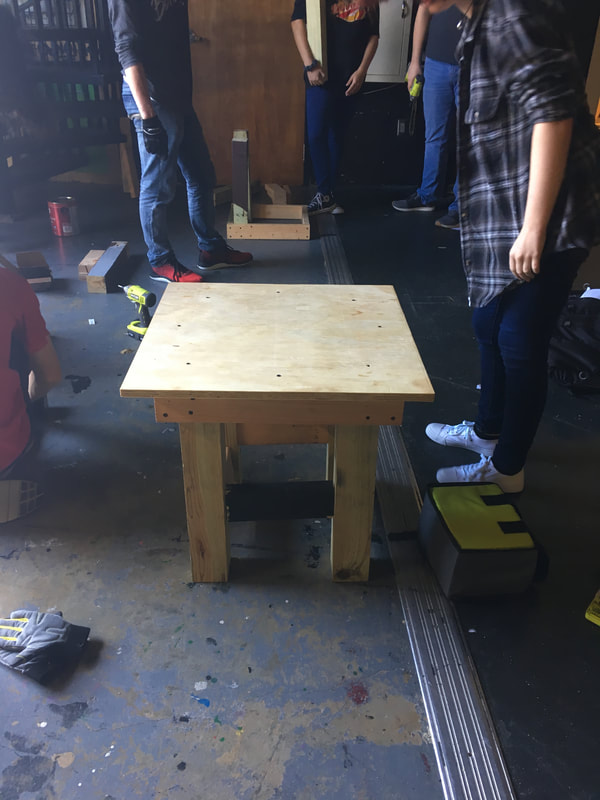
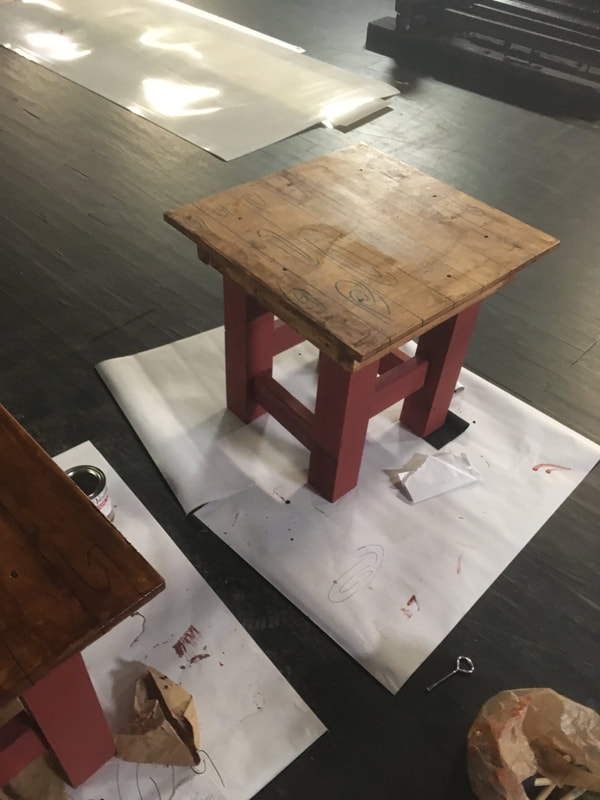
The wig worked out beautifully and held styling well. The show was a huge success. I would just recommend stocking up on hairpins to keep it in place during the fight on the tower. THE DESIGNS PROVIDED CAN BE SCALED UP FOR LARGER TABLES. THIS IS JUST WHAT SUITED OUR SMALL STOOLS AND SPACE FOR OUR SCHOOL PRODUCTION OF BEAUTY AND THE BEAST. All studen I am fortunate enough to have a great Technical Theater Production class this year. It has already given me plenty of opportunities to learn basic theater tech skills while working on our winter musical, Beauty and the Beast. Our first project this year, after certifying on the mitre saw and cordless drill for safety (and covering first aid) was to put those skills to use to create five miniature tables. For this project we used pre-cut 2'x2' sheets of 3/4" ply from Home Depot, plus our stock of 2"x4" lumber and some leftover 4"x4" beams. Two screw sizes were also used. This project was heavily supervised by both me and my advanced tech student. You should get each kid to demonstrate safe operation of the tools before the project begins. My students had a checklist of skills and steps they had to demonstrated and then we both signed it. This is a necessary step for the safety of the students and for legal reasons as well. Students were not allowed to work without safety glasses and close-toed shoes, and all measurements were double-checked by their other group members. 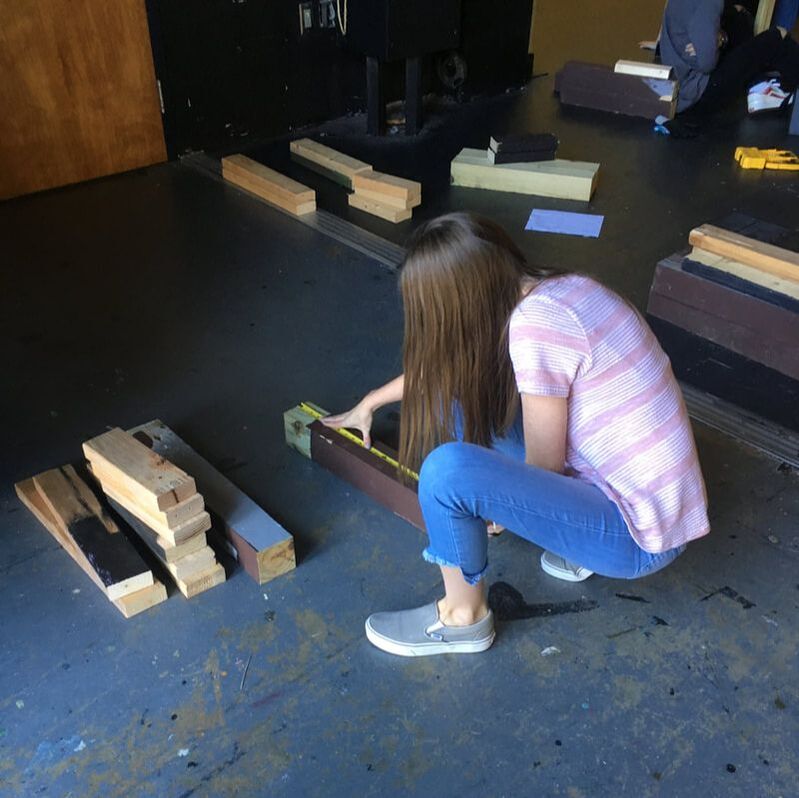 I began the project by giving out plans (link below) and asking kids to do a little math to figure out some of the missing measurements. We checked these as a class. We also figured out a plan of where to insert screws, reminding them that they could not cross paths. This meant a day of work before we even began to measure and cut. It was a slow project compared to what some Dads could crank out in a weekend, but it was fundamental for teaching those critical skills for construction.
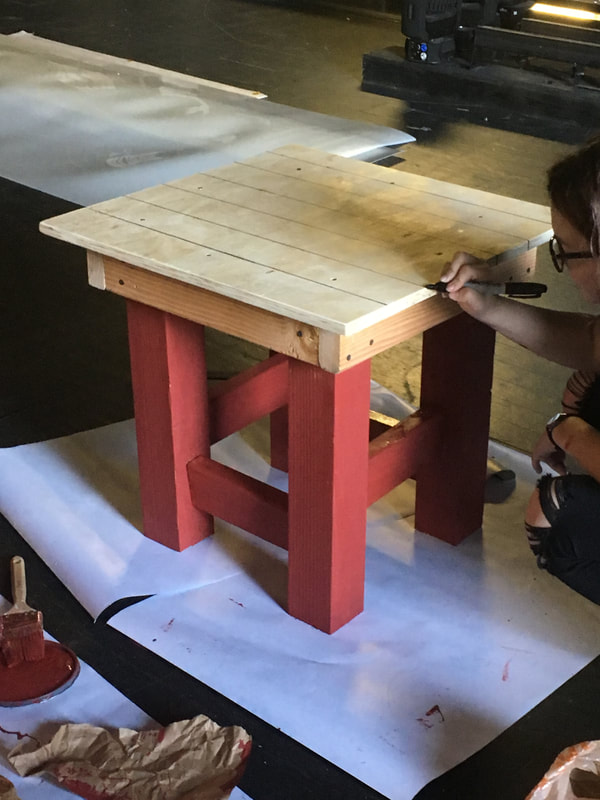
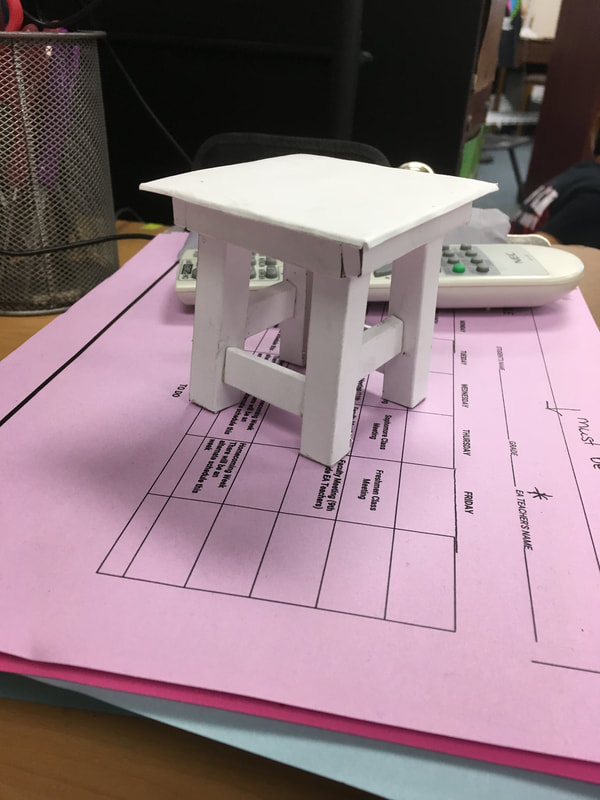
We spent a few days cutting and assembling. They built the frame first, then attached legs and crossbeams, the finally the tabletop. These were essentially redundantly stable mini platforms with an overhang. We will have boys standing on them and stomping in "Gaston," so we needed extra stability. If you want students to move on them more, then the overhang should be eliminated: if weight is put on the edges of the table, it will tip. If your tables aren't going to be holding a lot of weight, the cross braces can be eliminated. I liked the cross braces because students had to drill in at a 45° angle, which took skill and planning. We finished the tables with brick red paint on the legs (because we were covering up pre-painted 2"x4" boards and sanding them was too time intensive. Next students drew faux planks with permanent marker before using two coats of a 2-in-1 stain and poly. We used disposable brushes for the stain because we don't keep paint thinner or oil paints at the school. At the end of the project a student even made a paper model of our design and left it in my room as a piece of guerrilla art. Some of the tables were a bit better crafted than others, but with proper supervision and heterogeneous assignments of skill in the groups, I got five usable products.
Want to see them in action? Keep an eye on @omhsdrama on Instagram. Our show is in January! After hearing the name Airtable dozens of times on my theater teacher Facebook groups, I finally bit. It only took me a week of playing with the powerful database platform to realize that I needed to pay for the premium features and use this for the rest of my teaching career.
What is Airtable? Well think Sheets or Excel, but on steroids. Not only can Airtable organize a spreadsheet and take updates from a form submission, but it has powerful "Blocks" that let you create printable layouts, timelines, etc, AND you can pull in data from other sheets for some really amazing applications. Here are just three of the many ways I'm use Airtable to make my daily life as a drama teacher easier. There's been a lot of talk lately about extracurricular activities that ask for an all-or-nothing commitment from students. But where does it stop being the fault of the teachers, and start becoming the responsibility of parents and students to choose? When I was in high school, my gym teacher aggressively tried to recruit me to play lacrosse. I enjoyed it in class, but athletics where I attended tenth grade were daily after school, and I wasn't about to give up drama club from 2:05-4:30 every Tuesday and Thursday to play a sport. I was still able to serve as president of the National Honors Society, edit the student literary magazine, serve as my homeroom rep, and attend Monday meetings of the art club. And I held down twenty hours a week working retail, participated in Venture Scouting, and earned my Girl Scout Gold Award. I just couldn't play lacrosse.
Looking back I sometimes wonder if that was the right choice. I recently found out that The Savannah College of Art and Design (where I earned my BFA in Performing Arts) has a really good lacrosse team and that--had I been good enough-- I might have been able to get a scholarship instead of swimming in student loan debt for ten years after graduating. But playing lacrosse would have meant giving up so much more, and given the path I chose, those hours of rehearsal provided an education more valuable than being debt-free a few years earlier. |
AuthorAmy is a drama teacher with an M.Ed. in Secondary Education, ELA, teaching in the suburbs of Birmingham, AL. Archives
December 2020
Categories
All
|
||||||

 RSS Feed
